Messy Fun – shaving cream marbling

IMG_4013

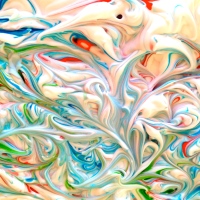
We love using unexpected materials at Sunshine Art, and Shaving Cream is just one such material. Kids and adults love to play with the smooth, growing, glossy foam. Its a great medium for paper marbling and produces amazing individual results.

‘Messy’ and ‘fun’ – two words that kids love to hear together! And this activity is just that!

What you need:

  • a tray
  • a spatula or piece of cardboard
  • shaving cream
  • a skewer
  • paper
  • liquid food colouring in a variety of colours


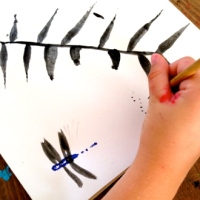
Step 1.  Spray a good amount of shaving cream into the tray.

IMG_4004

Step 2. Have a play in the shaving foam – see how good it feels!

IMG_4003

Step 3. Use your hands to smooth the foam over so it’s relatively flat on top.

IMG_4006

Step 4. Drop your colours onto the top of the foam – just adding small dots and splotches

IMG_4012

Step 5. Use the skewer to swirl the paint around to create a cool design. It doesn’t matter if the colours blend together a little.

IMG_4014

Step 6. Lay your paper down on top of the design and leave for a few seconds.

IMG_4015


IMG_4016

Step 7. Remove and let it sit for about a minute.

Step 8. Gently wipe off the shaving cream with a spatula or cardboard – it leaves the pattern behind. We carefully washed the paper to remove any excess shaving cream. Leave it to dry.

IMG_4031

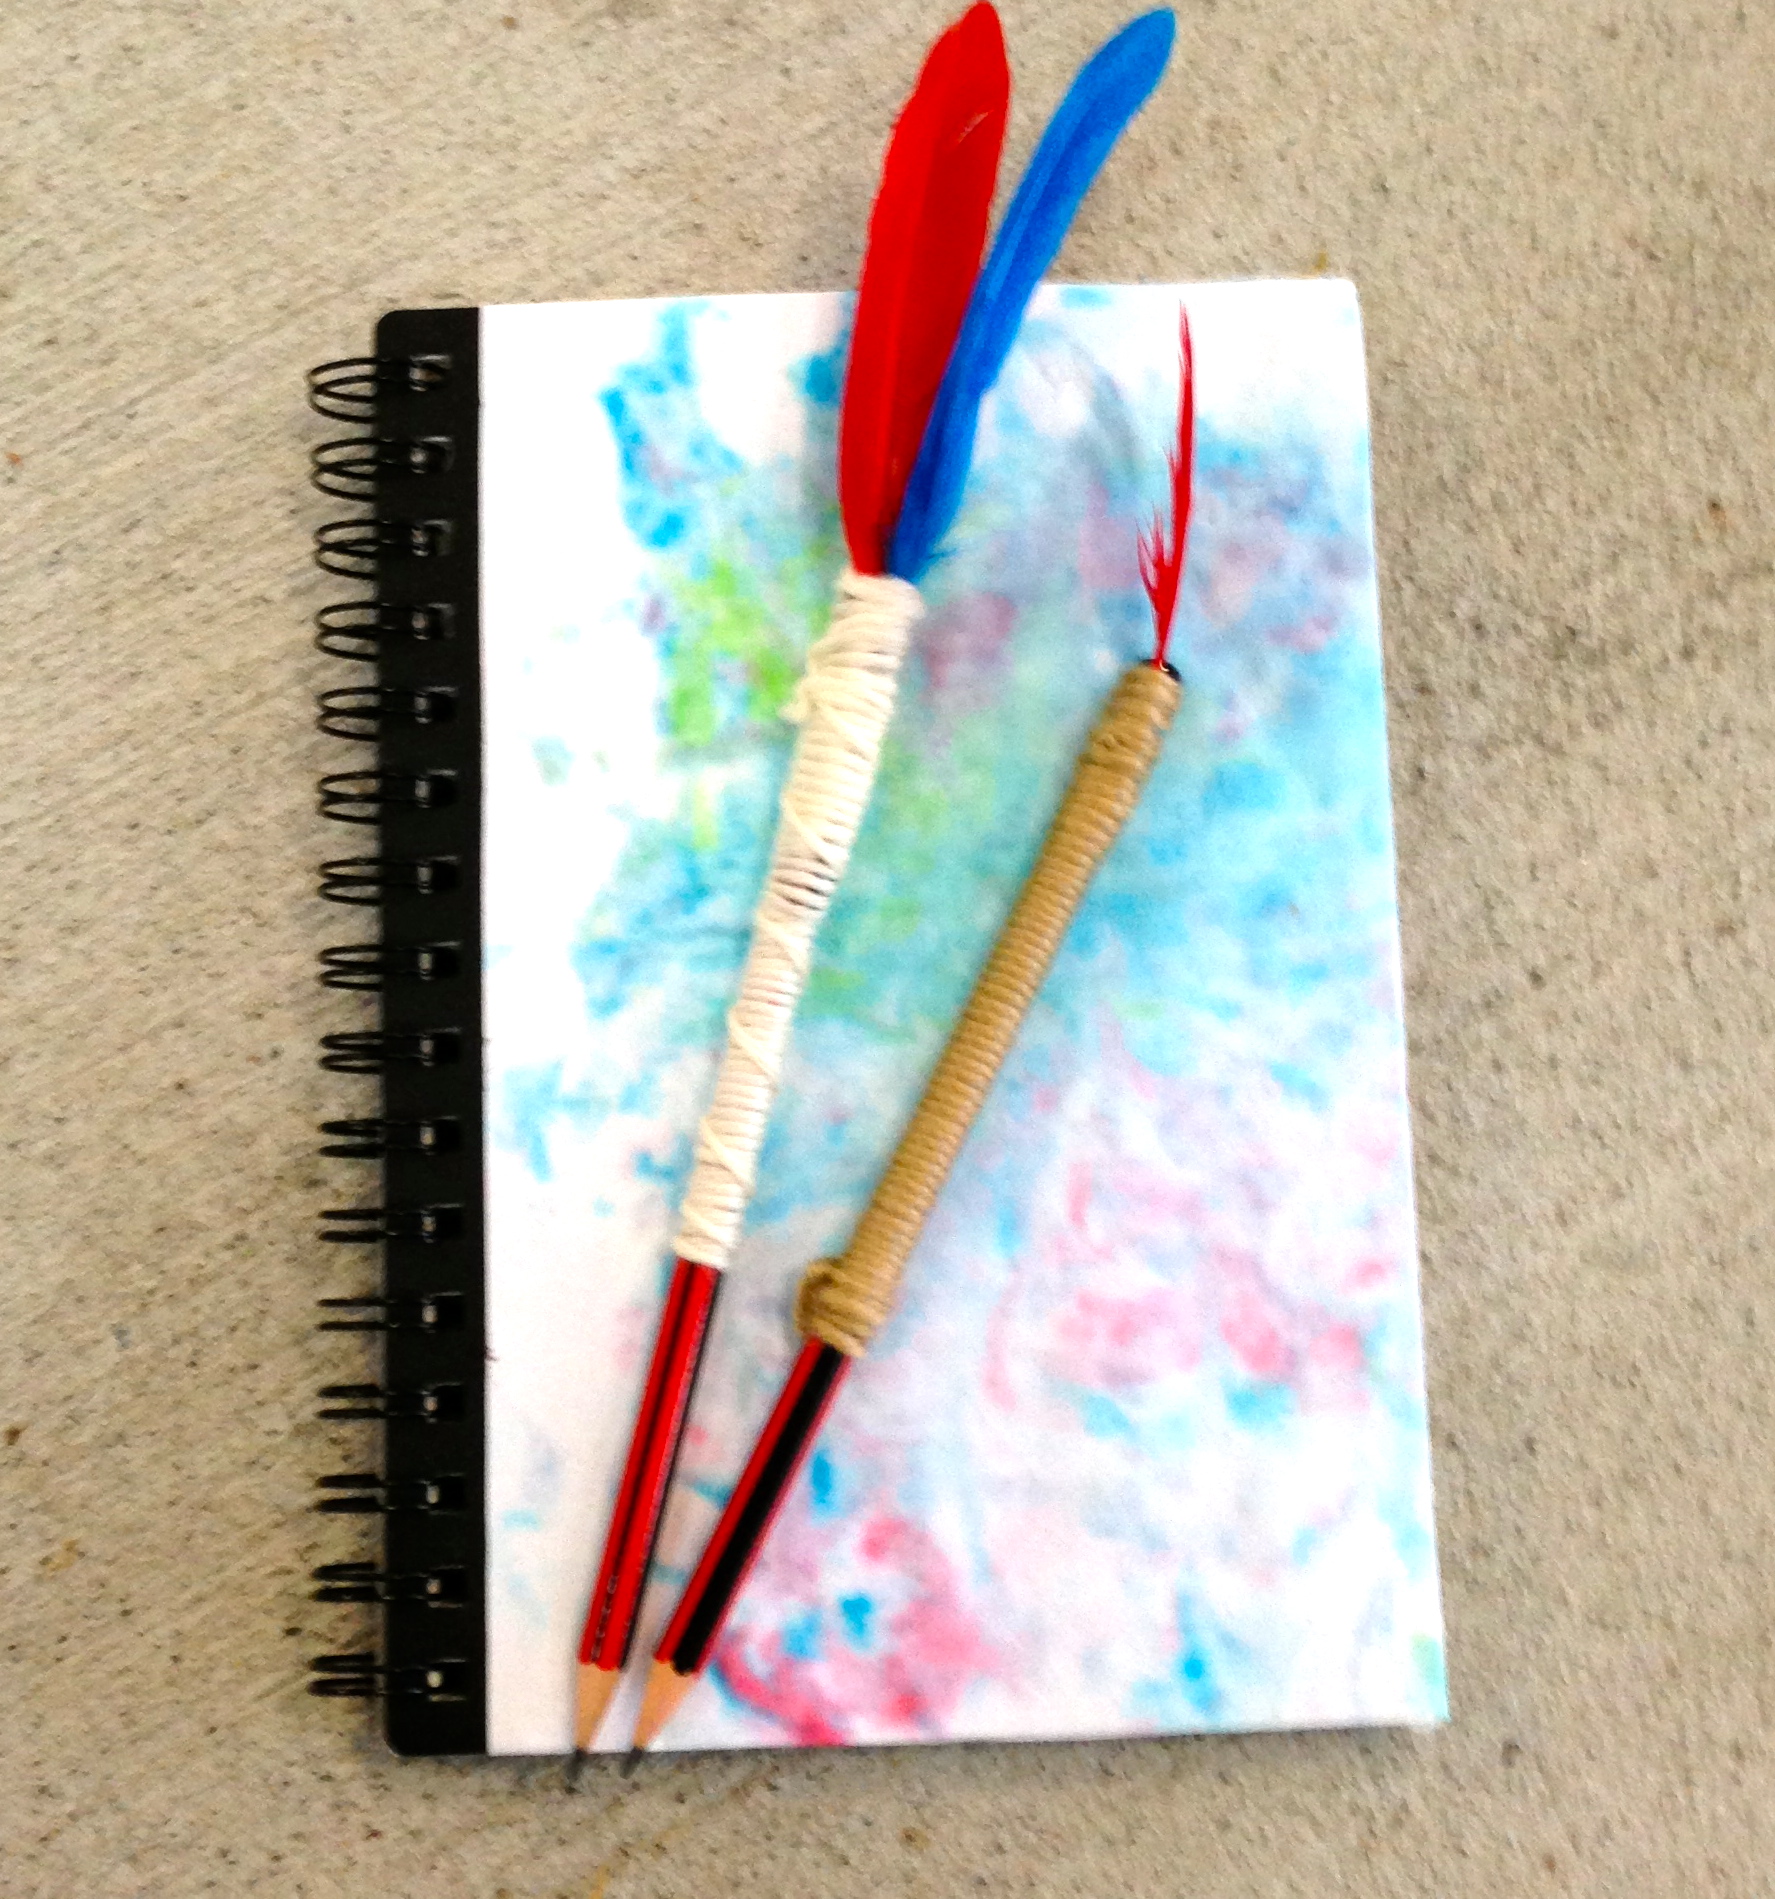
 Once our shaving cream marbled paper was dry, we used it to cover our sketching journals.

IMG_4017


Posted in art craft and science, paper marbling, shaving cream marbling, Workshops | Tagged , , , , , , , , , , , , | 2 Comments

Art and Action!


Workshop

Watch our video filmed and produced by Kerrin Smith

Our mid year holidays are coming to a close but our Sunshine Artists had a great time at our Workshops. These holidays we combined with Sargent Fitness to provide a workshop of mind bending creativity that included designing and building giant marble runs and also solving a huge 8ft puzzle. These activities concluded with a buzzing boot camp for kids. We had over 40 kids attend and they all had a really great time – what a great day to spend an amazing winters day – Art and Action!

Thanks Shannon Sargent for your firm but fair boot camp and to Kerrin Smith for filming

Posted in art craft and science, Workshops | Tagged , , , , , , , , , , , , , | Leave a comment

The Ancient Art of Quilling

Quilling is an art that involves the use of strips of paper that are rolled, shaped, and glued together to create decorative designs. The paper is wound around a quill to create a basic coil shape. The paper is then glued at the tip and these shaped coils are arranged to form flowers, leaves, and various shapes. It involved quite fine motor skills but with some help even young children are able to enjoy the process.

IMG_3291In the 18th century, quilling became popular in Europe. Quilling also spread to the Americas and there are a few examples from Colonial times.

IMG_3277

I was able to buy pre cut strips of coloured paper from a craft supply. (I think Spotlight has this product too.) We used bamboo skewers and chop sticks as our quilling tool but you could also purchase a specific tool. I prepared some earlier for our younger crafters and left the activity open ended allowing amazing designs to develop.

IMG_3276

We used PVA glue and small canvases as our base and I think you’ll agree we had some spectacular pieces.IMG_3288IMG_3289

Well done Sunshine Artists – we would love to see what you create at home

IMG_3279

Posted in art craft and science, Quilling, traditions, Uncategorized, Workshops, world history | Tagged , , , , , , , | Leave a comment

Paint a Plate – Mothers Day Love

IMG_2871I recently picked up these cute heart shaped plates from Target and together with the ever faithful Sharpie Marker we created some designs for our Mums.

IMG_2875

This is a super technique to decorate any piece of ceramic, be it plates, bowls or mugs. We were inspired by Martha Stewarts dot painting of plates and added our own touch.

IMG_2873Its as simple as planning and sketching a design, drawing directly on to the ceramic piece and when you are happy with your design bake your plate for 20 mintutes in a moderate oven.

IMG_2874

Posted in art craft and science, edible art, Uncategorized | Tagged , , , , , , , , , , | Leave a comment

Coloured Rice

Coloured Rice Just For Fun!

IMG_5866Sunshine Art Classes are primarily for School Aged Children and at present most of the students are not younger than 9 but.. I often find that the simple hands on activities that are enjoyed in preschool are really so much fun for older kids. Coloured Sensory Rice is just that activity. The directions are simple and achievable in a short time and the experience endless.

Coloring-Rice-Green-with-Food-ColoringIngredients

White Rice

Food Colouring

Rubbing Alcohol ( I have tried with white vinegar and it works too)

Ziplock Bags

Paper Towels

coloured riceMethod

Place the 1 cup of rice into each ziplock bag or a bowl add a couple of drops of food colouring and equal amounts of rubbing alcohol ( this quickly dries the colour on the rice). Mix the colour through and lie on the paper towel to dry – less than 1/2 hour

coloured rice 1

Then use the beautiful sensory coloured rice as desired

IMG_5868I would love to try something like this Indian Folk Art called Rangoli

rice art

Posted in art craft and science, traditions, Uncategorized, world history | Tagged , , , , , | 2 Comments

Enjoy the Pro – Quicksilver Pro 2013


FUN IN THE SUN WITH THE PROS!

IMG_2326


quicksilver pro enjoy the proIt is really the time for great events on the Southern Gold Coast. The Roxy and Quicksilver Pro brings our town alive. It is abuzz with pro surfers and those who love to bask in the atmosphere of the surf and the sun.

It is only fitting that we are inspired to create with a surfing theme. This year we looked at the art of  Harry Daily and his Sketch Holiday Series.

Sketch Holiday

We worked on simple contour drawings of each other in strange surfing poses and then talked about composing our pictures.

IMG_2307


We used simple black lines to fill our pages and then added colour with water colours. Some used wax resist techniques and others used salt on the water colour for a different result.

IMG_2315

IMG_2309


The art was wonderful and bright but the highlight may have been running into Mick Fanning and having him sign the artwork.

IMG_2323

A great day had by all – Good Luck Mick (and Parko!)

Posted in art craft and science, artists, Quicksilver Pro 2013, Sketch Holiday | Tagged , , , , , , , , , , , , , , , , , | Leave a comment

Bleach Festival

The Southern Gold Coast is so fortunate to host the amazing Bleach Festival

bleachbleach beastman

Bleach* brings together high calibre artists from around Australia and the Gold Coast for a 13 day celebration of music, photography, arts, theatre, film, ideas and lifestyle events. Bleach’s home is the world famous beaches and foreshores of the Southern Gold Coast combined with major venues within the region. The largest Festival on the Gold Coast, based on its geography, Bleach* will grow as a celebration of surf & beach Culture, delivered through a contemporary arts program.

It rained and poured and storm but credit to the organisers – the show went on!

Art in the Park – pop up gallery

bleach conatinersbleach conatiners

Art in the sky – Kirra Kite Fest

kite fest

Art in the surf – Ralph Riddell

ralph_prof-50f5383c9e9ab

Music, Markets, Performances, Fashion, Lifestyle – Strange Fruit

strange-fruit-50dd13645c4ad

Thanks Bleach for a great fest!

Posted in artists, Uncategorized, Workshops | Tagged , , , , , , , , , , | Leave a comment

Gong Xi Fa Cai

Happy Lunar New Year

IMG_1933

Our Welcome Back to our Sunshine Art Workshops coincided with this years Lunar New Year. The Year of the Snake was fairly prominent in our group and with its link to prosperity and luck and we thought it fitting to practice some Chinese Brush Painting.

Image

Learn Chinese brush painting

 Chinese brush painting is fun to do and a great way to learn a new painting technique.

IMG_1934

What You Need:

  • Chinese painting to reference
  • Rice paper
  • Bamboo brush
  • Water
  • Black ink

Activity:

IMG_1930

Find an image of a Chinese brush painting to use as a reference, for example, a painting of bamboo stalks, plum trees or birds.

Lay the rice paper onto a flat surface.

Dip the bamboo brush hairs in clean water, saturating the hairs from tip to base.

Lightly dip the tip of the brush in black ink, so that the bottom half of the brush is blackened with ink but the top is clean.

IMG_1932

Look at your Chinese brush painting image reference to determine the separate brush strokes used within that painting.

Hold the brush in your hand so that the handle is more horizontal than vertical.

Pick a brush stroke used in your reference image to copy.

Drag the brush slowly, moving your arm instead of your wrist, to create one long stroke, never lifting the brush from the paper until the stroke is complete.

Change the positioning of the brush as you move across the paper without lifting the brush.

Dip the brush in water and repeat the process.

Use single brush strokes until you have completed the painting.

IMG_1929

Posted in art craft and science, artists, traditions, Uncategorized, Workshops, world history | Tagged , , , , , , | Leave a comment

Edible Art -YUM

IMG_1508There is always pleasure in eating what you make and when its sweet and crunchy and pretty – there is not much better.

IMG_1505

We bought some delicious biscuits (cookies) from Ikea but you could definetly make your own and then set about decorating them with Royal Fondant Icing. Again you could make this but we purchased this one.

You also need

baking paper to work on

extra icing sugar to prevent the icing from sticking to your baking paper

rolling pins and cookie shapes and cutters

gel icing tubes

silver cachous

small bowl of water

We showed our artist how to add a very small amount of food colour and to knead the icing to mix it thoroughly and how to mix and marble several colour together.

IMG_1513

IMG_1514


It was important to very lightly brush the icing with water and apply the biscuit to the icing a press softly – this allowed the icing to stick to the biscuit

IMG_1517

Adding  gel icing and shiny cachouls just made the works of art.

IMG_1520IMG_1519IMG_1507

Posted in art craft and science, edible art, Uncategorized, Workshops | Tagged , , , , , , , , | Leave a comment

It’s all about the GOO!

IMG_1535

The tactile nature of mixing and pouring and stiring gives such pleasure to kids. We have made Goo/Slime in our workshops previously but this activity was welcomed again with great enthusiasm.

IMG_1523

Ingredients

250ml bottle of clear glue

1/2 cup of warm water

1 teaspoon of Borax

2-3 drops of food colouring

Air tight container and markers

IMG_1528

We began our activity by decorating our Slimy Goo containers. We also made several batches of Slimy Goo so we could experiment with colours and share them with each other.

Then it was time to mix!

IMG_1521

IMG_1527

Empty the glue into a bowl and add the desired food colouring. Mix the borax and water in a cup. Add the borax mixture to the coloured glue, stir and watch the reaction. Within seconds  you’ll feel the long strands of molecules starting to connect. It’s time to abandon the spoon and use your hands to do the serious mixing. Keep adding the Borax solution to the glue mixture (don’t stop mixing) until you get a perfect batch of  slime.

IMG_1534

Did You Know….

The history of Silly Putty is quite amusing. In 1943 James Wright, an engineer, was attempting to create a synthetic rubber. He was unable to achieve the properties he was looking for and put his creation (later to be called Silly Putty) on the shelf as a failure. A few years later, a salesman for the Dow Corning Corporation was using the putty to entertain some customers. One of his customers became intrigued with the putty and saw that it had potential as a new toy. In 1957, after being endorsed on the “Howdy Doody Show”, Silly Putty became a toy fad. Recently new uses such as a grip strengthener and as an art medium have been developed. Silly Putty even went into space on the Apollo 8 mission. The polymers in Silly Putty have covalent bonds within the molecules, but hydrogen bonds between the molecules. The hydrogen bonds are easily broken. When small amounts of stress are slowly applied to the putty, only a few bonds are broken and the putty “flows.” When larger amounts of stress are applied quickly, there are many hydrogen bonds that break, causing the putty to break or tear.

Posted in art craft and science, Uncategorized | Tagged , , , , , , , | Leave a comment